Installing a Claude Skill
A Skill is a single .zip you upload to Claude once.
After that it rides along automatically — it carries its own rules, reference kit, and output
format, so you never paste instructions or re-attach files. This is the one-time install. It’s the
same three minutes for any of our kit Skills, including the
FNMA AI Lender Letter Skill.
.zip you downloaded.
-
1 Turn on Code execution
Open Settings → Capabilities and turn on Code execution. Skills need it to run — if it’s off, the skill installs but won’t do its work.
-
2 Open the Skills panel & click +
Go to Settings → Customize → Skills. At the top of the Skills list, click the +.
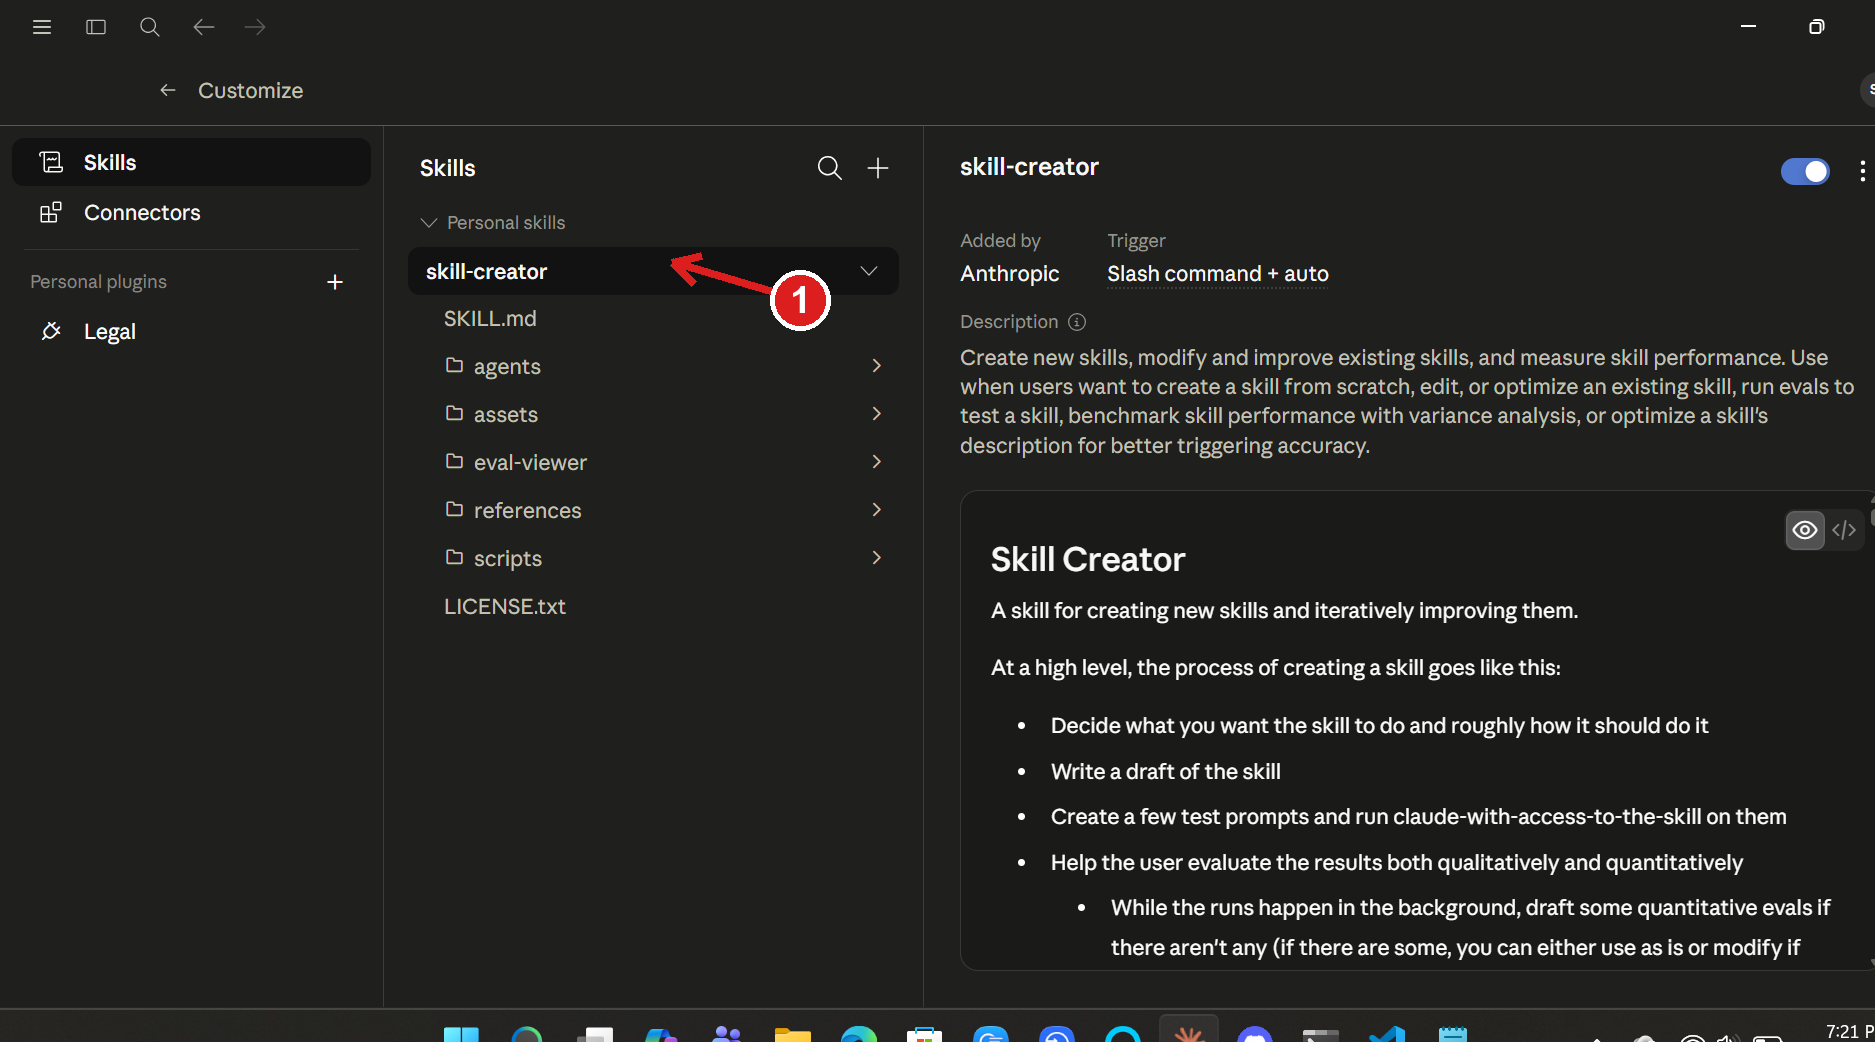
Settings → Customize → Skills — the + sits at the top of the list. -
3 Choose Create skill → Upload a skill
In the menu, hover Create skill and pick Upload a skill. Select the skill
.zipyou downloaded (for the FNMA kit that’sfnma-ai-lender-letter-skill.zip).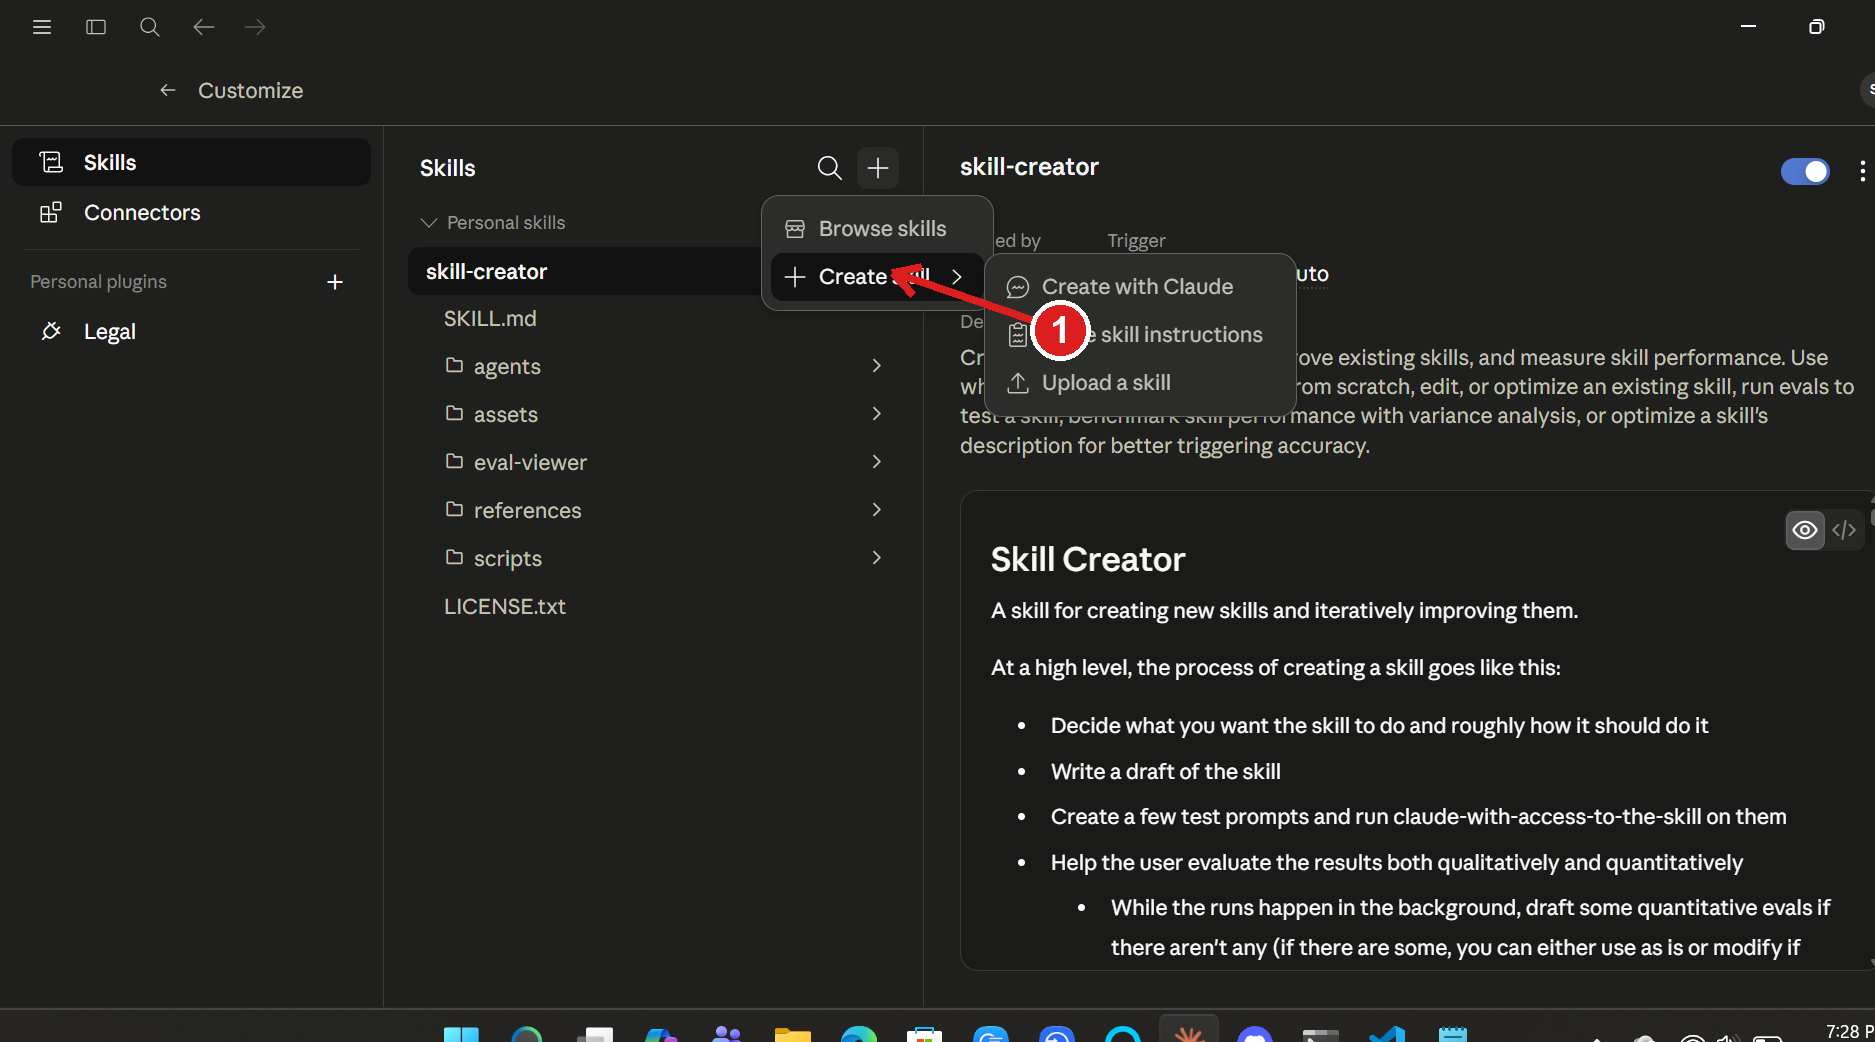
Create skill → Upload a skill, then pick the .zip. -
4 Toggle the skill ON
Once it’s uploaded, the skill appears in your Skills list with a switch on the right. Flip it ON. That’s the install — you won’t do this again.
-
5 Use it — just talk to Claude
Start a chat (or open a Project and work inside it) and say what you want — the skill triggers itself. You only ever upload your own documents; the skill carries everything else.
Don’t put the skill
.zipin a Project. A Skill is installed in Settings (above), not added as a Project file. Projects hold your documents; the Skill lives alongside them.
On claude.ai (web) vs. the desktop app. The screenshots above are the desktop app. On the web the path is the same idea — Settings → Capabilities for Code execution, then the Skills section with the same + → Upload a skill. Wording moves around occasionally as Claude updates; look for “Skills” and “Upload.”
← Back to the FNMA AI Lender Letter kit